House Drawing Lesson at a Glance
This beginner lesson uses six clear pictures. Children first construct the main house and roof, add the architectural details, build the garden setting, and then color one section at a time. Click any picture to open the large viewer and move forward or backward through the steps.
Materials Needed
- White drawing paper or a sketchbook
- HB pencil and a clean eraser
- Black marker or dark drawing pencil
- Ruler for children who want straighter edges
- Red, yellow, blue, orange, green, gray, and brown colors
- Crayons, colored pencils, oil pastels, or markers
How to Draw a House Step by Step With Pictures
Follow the pictures in order. Keep the first lines light if you are using pencil, because small corrections are normal. Once the full outline looks balanced, trace the important lines more clearly and begin coloring.
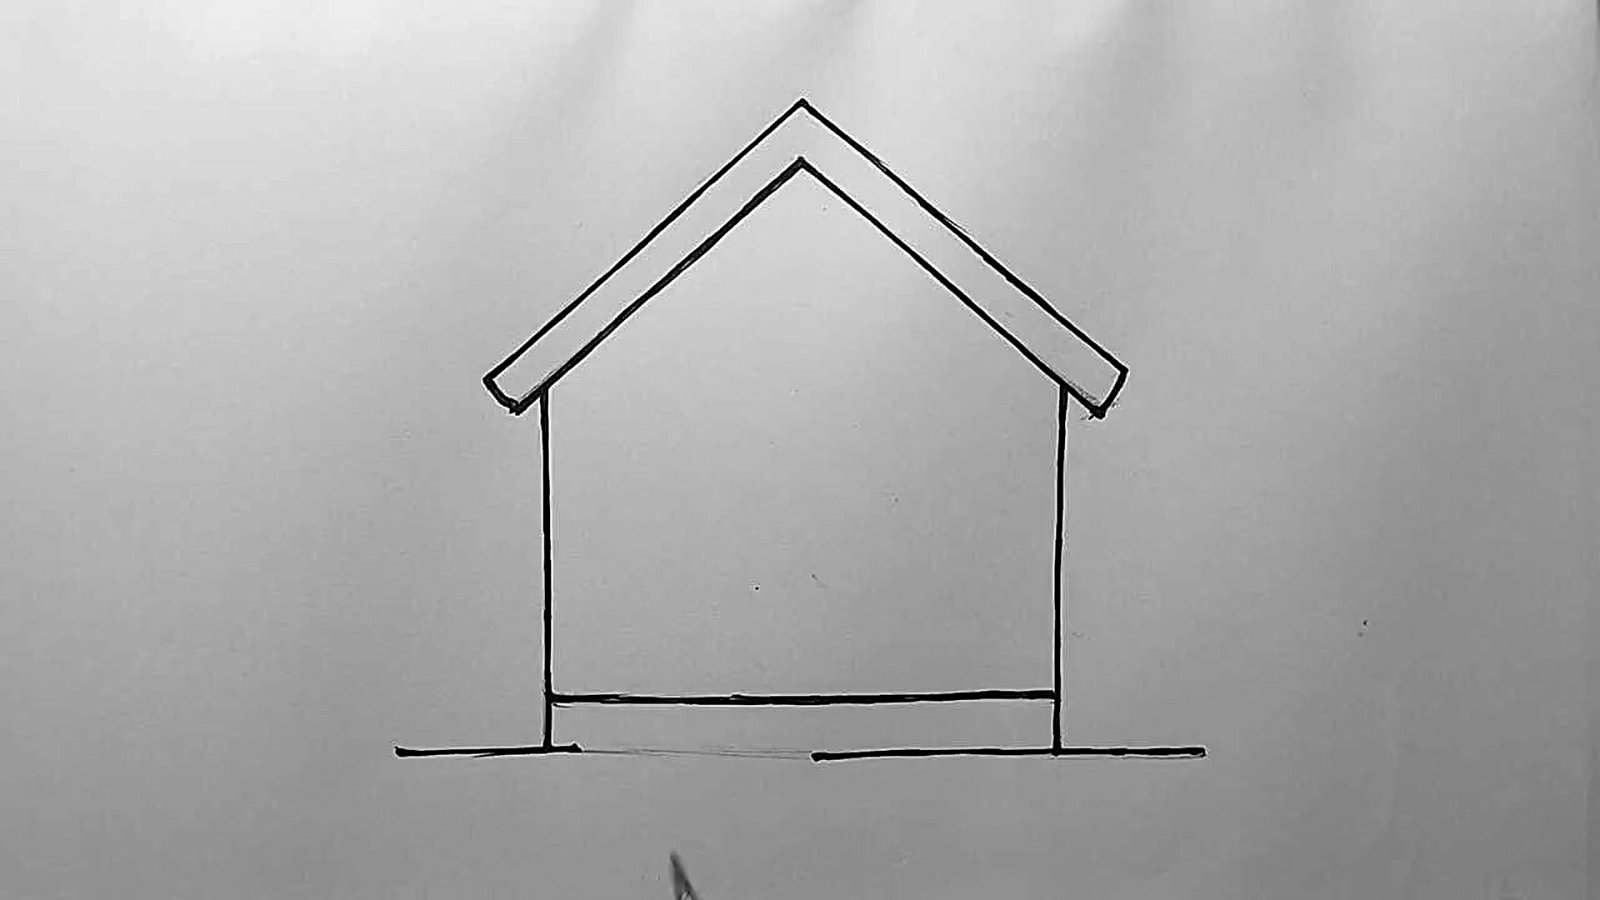
Begin with two upright wall lines and connect them near the bottom. Add a pointed roof using two diagonal lines, then draw a second parallel line to give the roof a thick finished edge. Complete the base and extend a ground line on both sides.
Draw a tall rectangle for the door and a small circle for its knob. Beside it, make a square window with a thicker frame and divide the glass into four panes. Add two low rectangular steps below the entrance.
Add two circles near the roof center and divide the inner circle into four window panes. Build a chimney behind the right roof slope with stacked horizontal sections. Finish the outline by drawing soft, cloud-like bushes on both sides.
Start the color stage with a strong red. Fill the thick roof border, the round attic-window frame, the large square-window frame, and the cap at the top of the chimney. Keep the window glass and house wall uncolored for the next step.
Fill the front wall with yellow, carefully coloring around the door and windows. Use yellow on the chimney sections and blue inside both windows. The red frames now stand out clearly against the yellow and blue areas.
Color the door orange-brown, add brick marks to the chimney, and shade the bushes and lawn green. Finish the foundation, gray front steps, and a wide pathway leading toward the viewer. Clean the outlines to complete the artwork.
Why This Easy House Drawing Is Good for Beginners
A house is an excellent first architectural subject because it combines shapes children already recognize. The wall is based on a rectangle, the roof uses a triangle-like peak, the door and large window use rectangles and squares, and the attic window begins with circles. Children learn that a complete picture can be constructed by arranging simple forms carefully.
The lesson also develops spacing. The door needs enough room to sit beside the window. The attic window must fit below the roof peak. The chimney rises behind the roof rather than floating separately. These decisions introduce composition and proportion in a friendly way.
Tips for Drawing Straight Walls and a Balanced Roof
Young artists may use a ruler, but freehand lines are also valuable. If drawing without a ruler, move the pencil slowly and look toward the place where the line should end. Keep the two walls approximately the same height. Place the roof peak above the middle of the house so the two slopes feel balanced.
Do not press too hard during the outline. Light pencil lines are easier to correct. Once the structure is complete, trace the final edges with a darker pencil or black marker. This two-stage method helps children separate planning from finishing.
How to Color the House Neatly
Color one area at a time and work around the edges first. Short strokes can fill narrow spaces such as the window frame, while longer strokes are useful on the wall and lawn. Children can follow the shown red, yellow, blue, orange, and green palette or design a different color scheme.
For extra depth, use a slightly darker version of each color near the bottom or edge of a shape. A pale highlight can be left in the windows. The pathway may become wider as it approaches the bottom of the page, creating a simple feeling of distance.
Creative Ideas After Finishing the Tutorial
- Add clouds, birds, a sun, or a rainbow behind the roof.
- Draw flowers in front of the bushes and along the pathway.
- Change the round attic window into a heart, star, or square.
- Add curtains, a welcome sign, house number, or mailbox.
- Create a nighttime version with a dark sky and glowing windows.
- Draw a family, pet, bicycle, or car outside the house.
Skills Children Practice
This house tutorial supports line control, shape recognition, symmetry, spacing, overlapping, color planning, careful filling, foreground and background awareness, and the confidence to complete a multi-step artwork.
Frequently Asked Questions
What age is this house drawing for? The lesson is designed for children and beginners. Younger children may need help drawing the roof and window divisions, while older students can add shadows and more environmental details.
Is a ruler required? No. A ruler can make the architectural edges straighter, but freehand drawing is useful practice and gives the house a personal character.
Which coloring materials work best? Crayons, colored pencils, oil pastels, and markers can all work. Use the material the child can control comfortably.
Can students choose different colors? Yes. The pictures provide one bright example, but children can design a house using their favorite colors.
Artwork Completed? Submit Your House Drawing
Share the finished artwork through the Chitran student portal, or join a live online class for real-time teacher guidance in drawing, coloring, watercolor, acrylic painting, cartoons, landscapes, and creative composition.